


Description
Description :

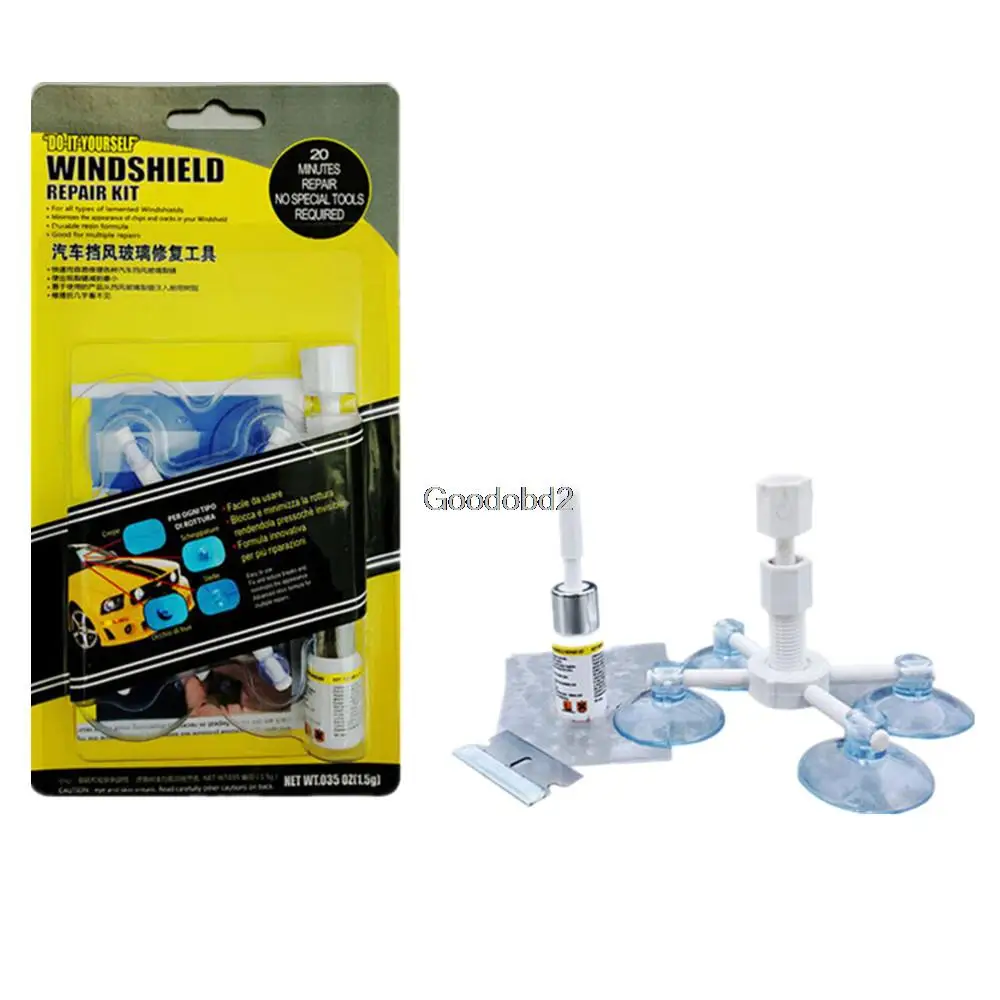

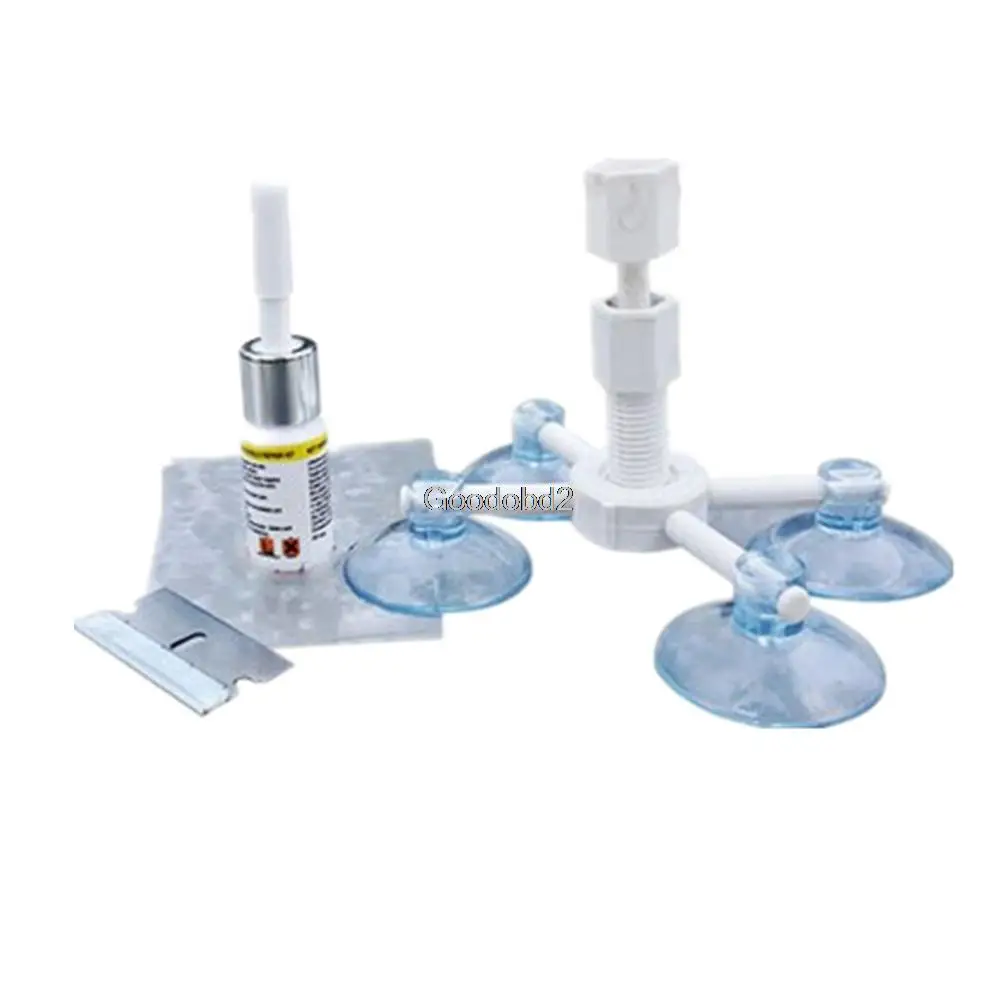
• Easy to Operate:Allow you to make permanent air-tight repairs on most laminated windshield glass. such as repair small cracks, cobwebs, star damage , combination damage and so on only in 20 minutes.
• Imported repair fluid:Reinforced injection sealant dispensing head, can produce a strong pressure will repair fluid forced into the cracks. the shear strength can reach to 20PA, the repair location will not be broken even though glass break. And can prevent small cracks from spreading.
3.How to use Windshield glass repair tools set(Photos are for reference only, specific to the main figure kind prevail)

Instruction

Traditional repair tools working principle
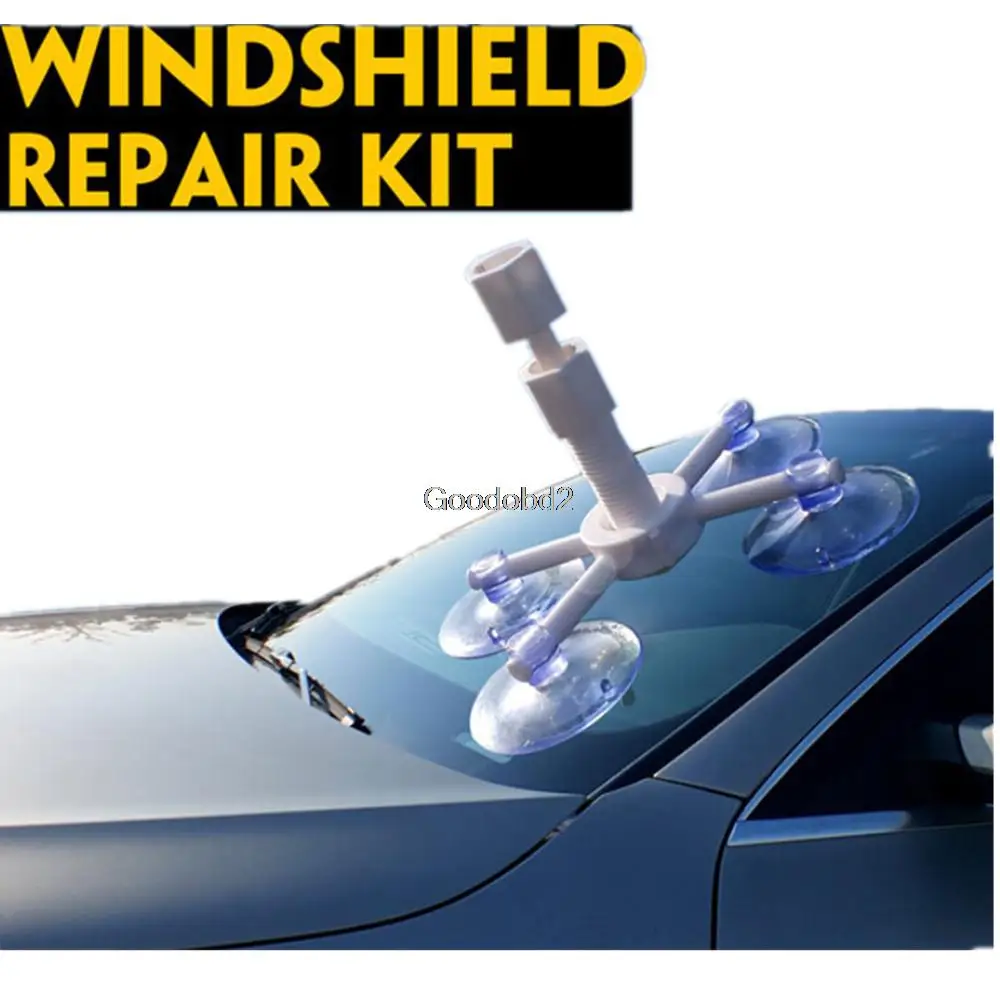
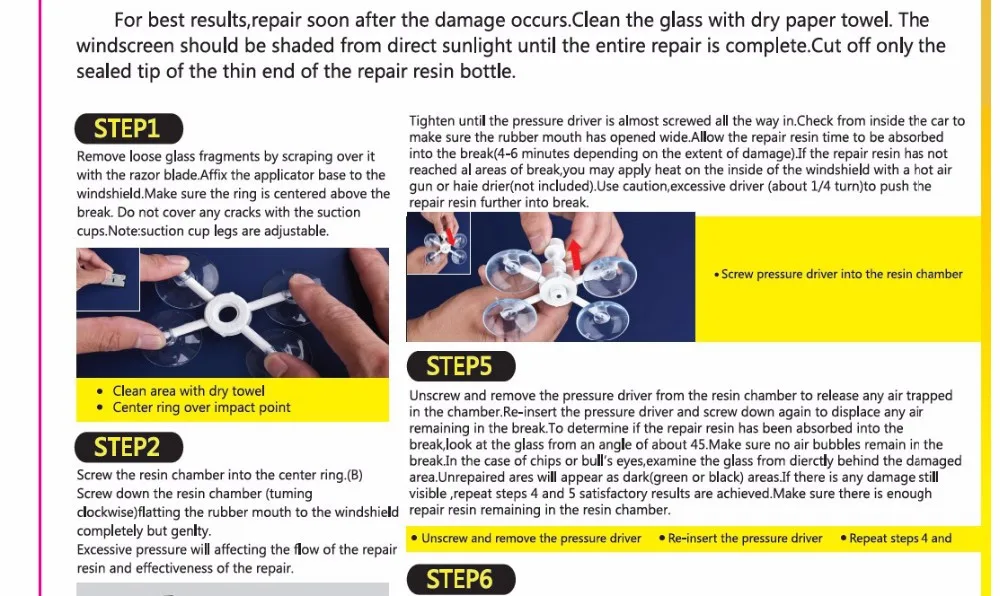
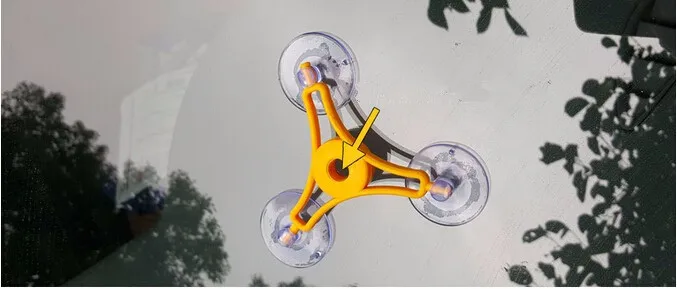
1.Remove loose glass fragments by scraping over it with the razor blade. Affix the applicator base to the windshield. Make sure the ring is centered above the break. Do not cover any cracks with the suction cups. Note:suction cup legs are adjustable.
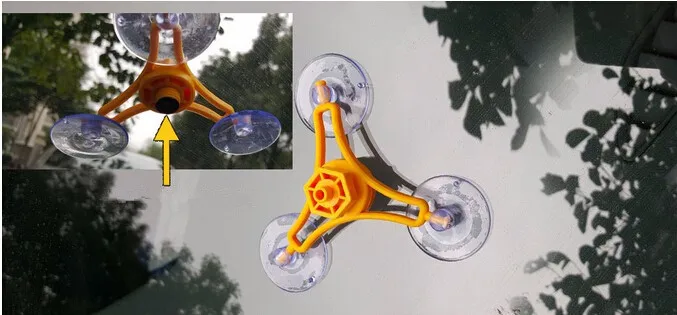
2.Screw the resin chamber into the center ring. (B) Screw down the resin chamber (turning clockwise) flatting the rubber mouth to the windshield completely but gently. Excessive pressure will affecting the flow of the repair resin and effectiveness of the repair.
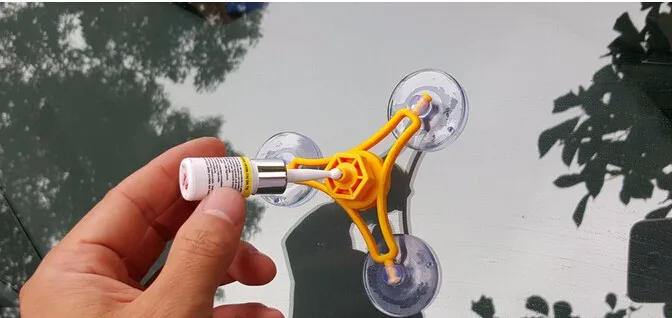
3.Squeeze 5-8 drops of the repair resin (depending on the extent of the damage)into the resin chamber, If the resin leaks out of the bottom of the resin chamber,gently turn the resin chamber clockwise, just enough to prevent leakage.
Pressurizing : A: Take the injector out from resin chamber, make the plunger to its maxi position, put the injector back to resin chamber, then the injector is full of air inside. (See picture A) B: Rotate the plunger to release spring clip from lower notch, depress the plunger downward to engage spring clip to upper notch.
If some parts are still not well repaired after application base is taken off the glass, please repeat step 1 to step 5.

6.After the air has been removed, Remove the entire apparatus by lifting up on the small tabs on suction cups. Gently wipe away excess repair resin from the applicator so it does not drip down the windshield. Add a drop of the repair resin onto areas where damage is still visible and cover with a curing strip for the finishing touches. When applying the curing strips to the repair,no pressure is necessary, gently place the strips on the
glass.

7.When the entire application procedure is complete,move the car (windscreen)into direct sunlight or use an ultraviolet light. Allow the repair resin to cure completely (about 5 to 10 minutes), then remove the curing strips. The repair resin must be dride before scrapping away the hared-ened excess resin with the razor blade,Hold the razor blade at a 90 angle to the windshield when scraping for best results. Scrape until the hardened resin comes off in white flakes. If a blemish still remains at the impact point,apply a small drop of the repair resin directly to the chip. Cover the area with a curing strip and scrape over top of strip with razor blade to force resin from the chip. This should leave the repair resin in the remaining blemish only. When this cures,carefully scrape hardened repair resin from all areas except the impact point.
PRECAUTIONS: Avoid eye contact. Do not get on skin or clothing. Avoid breathing of vapors. Use only with adequate ventilation. Do not swallow. Wash thoroughly after handling. Close container
after each use.
KEEP OUT OF REACH OF CHILDREN.
FIRST AID INFORMATION
Payment & Security
Your payment information is processed securely. We do not store credit card details nor have access to your credit card information.